A Mac video editor that opens on your recording
A video editor for Mac normally opens empty and waits for an import. This one opens on the take you just stopped — already on the timeline, its tools down one side, and nothing you do written back into the original file. Choose Combine Recordings to put several takes in one project and cut them into one video, clip by clip.
Free to use. Recordings are capped at three minutes and recorded at 720p with a watermark.
The half nobody budgets for
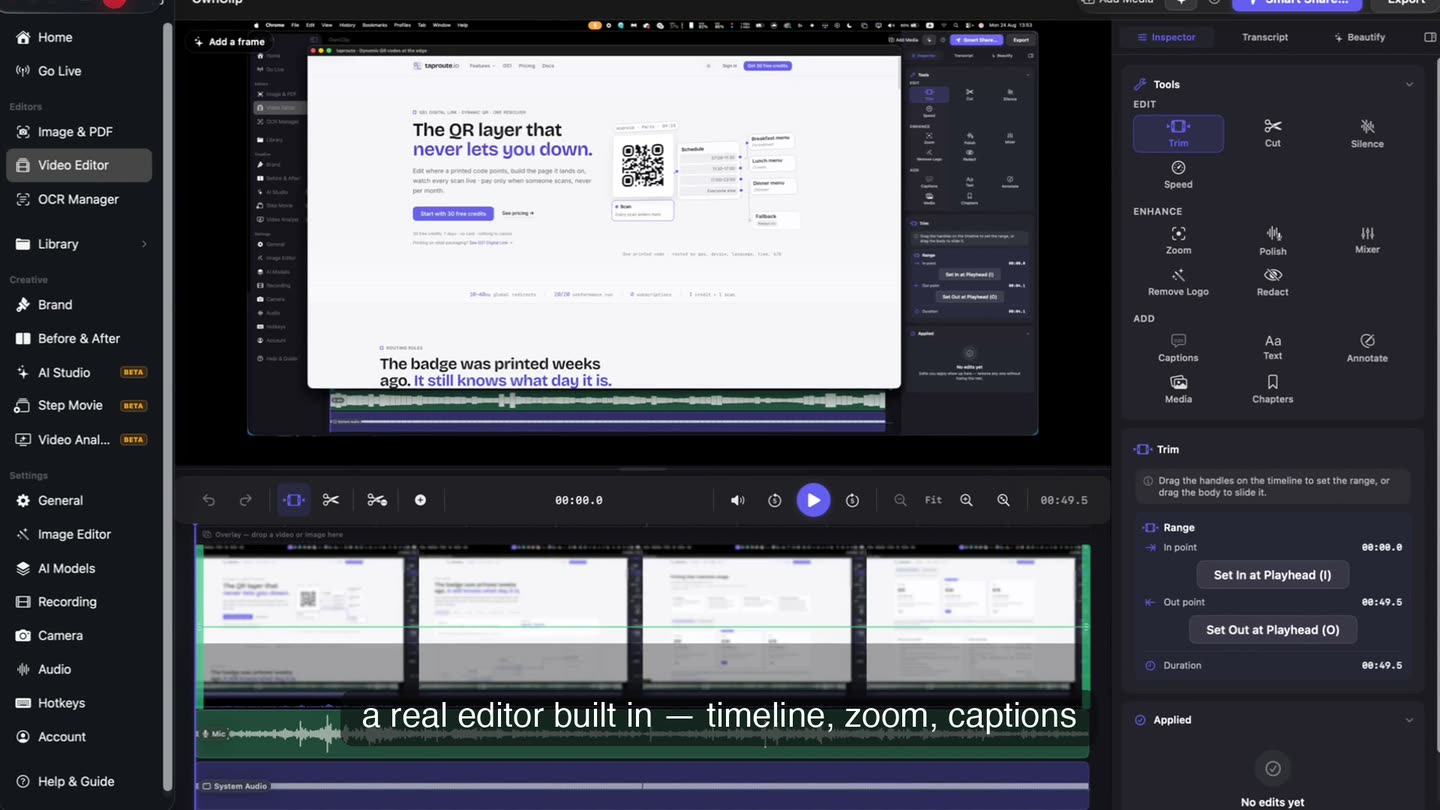
Recording a five-minute walkthrough takes five minutes. Editing that screen recording is the part that eats the afternoon: trimming the false start, pushing in on the field you are pointing at, captioning the narration, marking the thing you meant. Most of that work happens in a second application nobody on the team has opened this year.
A simple video editor for macOS only has to do those four things well. Keeping them in the same window as the recorder changes what gets made — a take stops being a file you will deal with later and becomes something you finish while you still remember what you were trying to show.
The take is already loaded.
Stop the recording and the editor already has it: the clips laid out as a filmstrip, the text and style controls open, the timeline ready to cut. There is nothing to export first and nowhere else to open it. Need another take in the same video? Choose Add Recording and it lands on the timeline as more clips.
- Filmstrip
- Text and style controls
- Non-destructive
The tools down the side
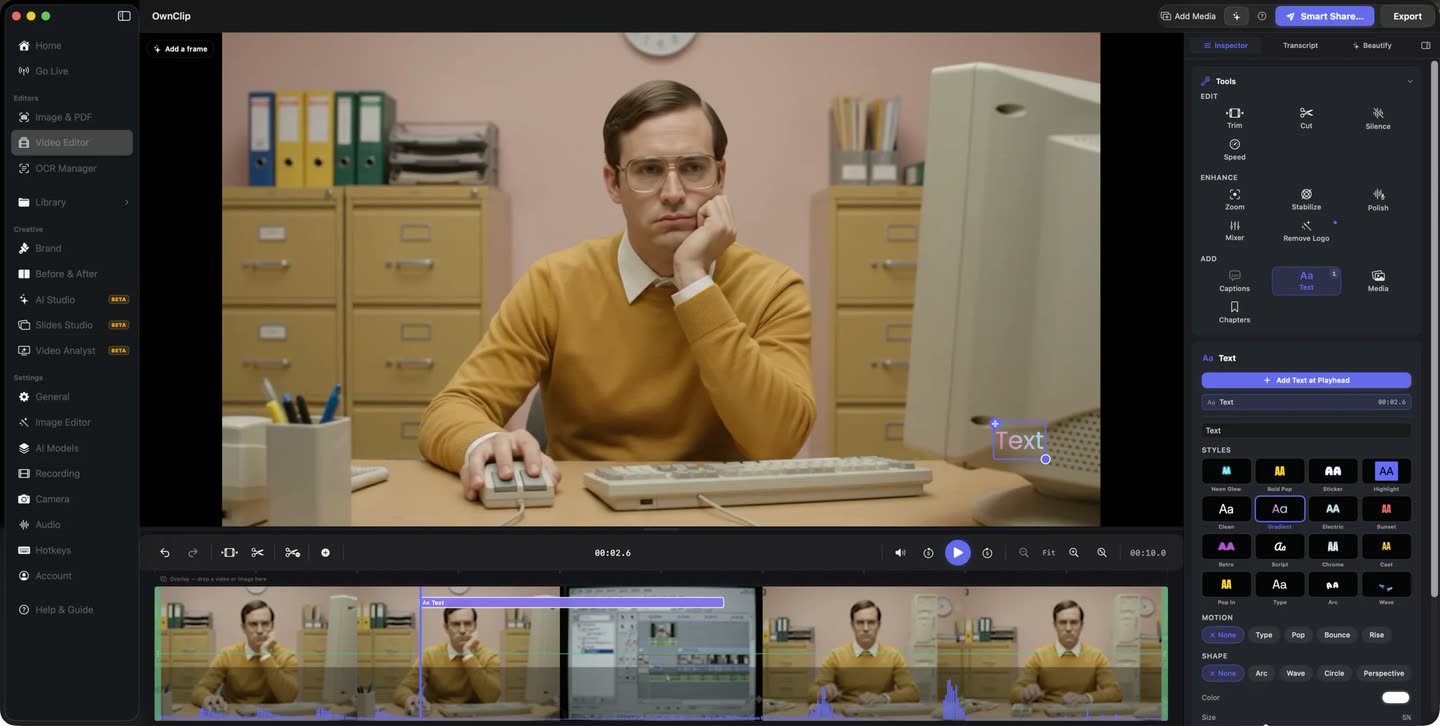
The timeline is made of clips, and the panel is grouped the way the work happens. Edit covers trim, cut, silence removal, speed and chapters. Enhance covers zoom, camera layout, audio polish, the mixer, Remove Logo and Redact. Add covers captions, on-frame text, annotations and inline image or video blocks. Every one of them, Smart Zoom included, works on the free tier.
Several recordings, one project
Choose Combine Recordings on Home, Edit Together in the Library, or Add Recording in the editor. Each keeps its own blurs, camera and trims.
Split, trim, reorder
⌘B splits the clip at the playhead. Drag either end to trim, delete a clip and close the gap, drag clips into a new order, and drop the silences.
A Look for every clip
Ten ready-made looks and six sliders per clip, with Copy, Paste and Apply to All Clips.
Keyframes
Move, scale, turn, crop and fade a clip over time, from the inspector, on the preview or on the timeline.
Zoom where the work is
Cinematic Zoom takes the keyframes you place. Smart Zoom builds the moves from the cursor activity in the take. Both work on every tier.
Captions under the narration
Timestamped, correctable, burned in at export — or written out as an SRT or WebVTT file instead.
A transcript you can cut from
Speech becomes editable text on your Mac in 20 languages, and deleting a sentence deletes that stretch of video.
Marks on the frame
Arrows, boxes, highlighter, freehand pen, numbered step badges and emoji stickers, each on its own stretch of timeline.
Out in the format you need
MP4, HEVC, MOV, ProRes 422 or 4444, and GIF. ProRes is there on the free tier too.
Fix the sound on its own.
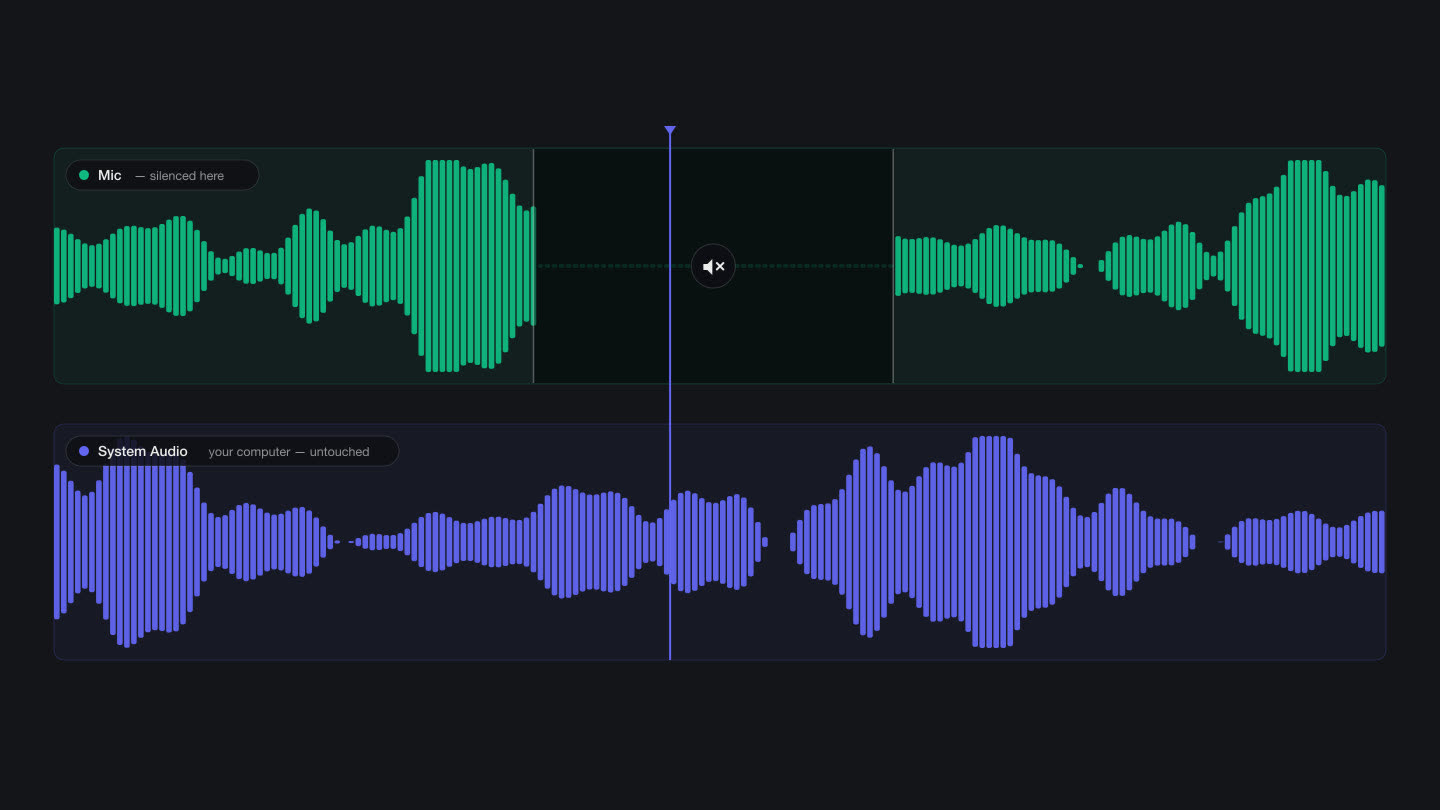
A take that caught your microphone and the computer at once opens with the two as separate tracks. Silence a stretch of one and the other keeps playing, which is how a cough comes out without losing what was on screen.
- Two tracks
- Mute a time range
- Non-destructive
From stopped take to finished file
- 1It opens where you stoppedThe recording is on the timeline with its clips and its audio, ready to work on.
- 2Cut it down firstSplit with ⌘B, delete the false start, trim the ends and drag the clips into order. Length is the edit that matters most.
- 3Make it legibleZoom into the part you are talking about, caption the narration, mark what you are pointing at.
- 4Export as often as you likeThe edit lives in a project beside the file, so a change next quarter is a re-export rather than a re-record.
Marks that come and go.
An arrow appears while you are talking about the thing it points at, then leaves when you move on. Every mark has its own stretch of the timeline, and none of them touch the frames until you export.
Nothing is baked in
Every edit lives in a project file beside the recording, and the original take is never rewritten. Each edit is one Undo step, named in the Edit menu, so a cut you regret is an undo, not a re-record, and a video you exported last month can be reopened, adjusted and sent out again from the same source.
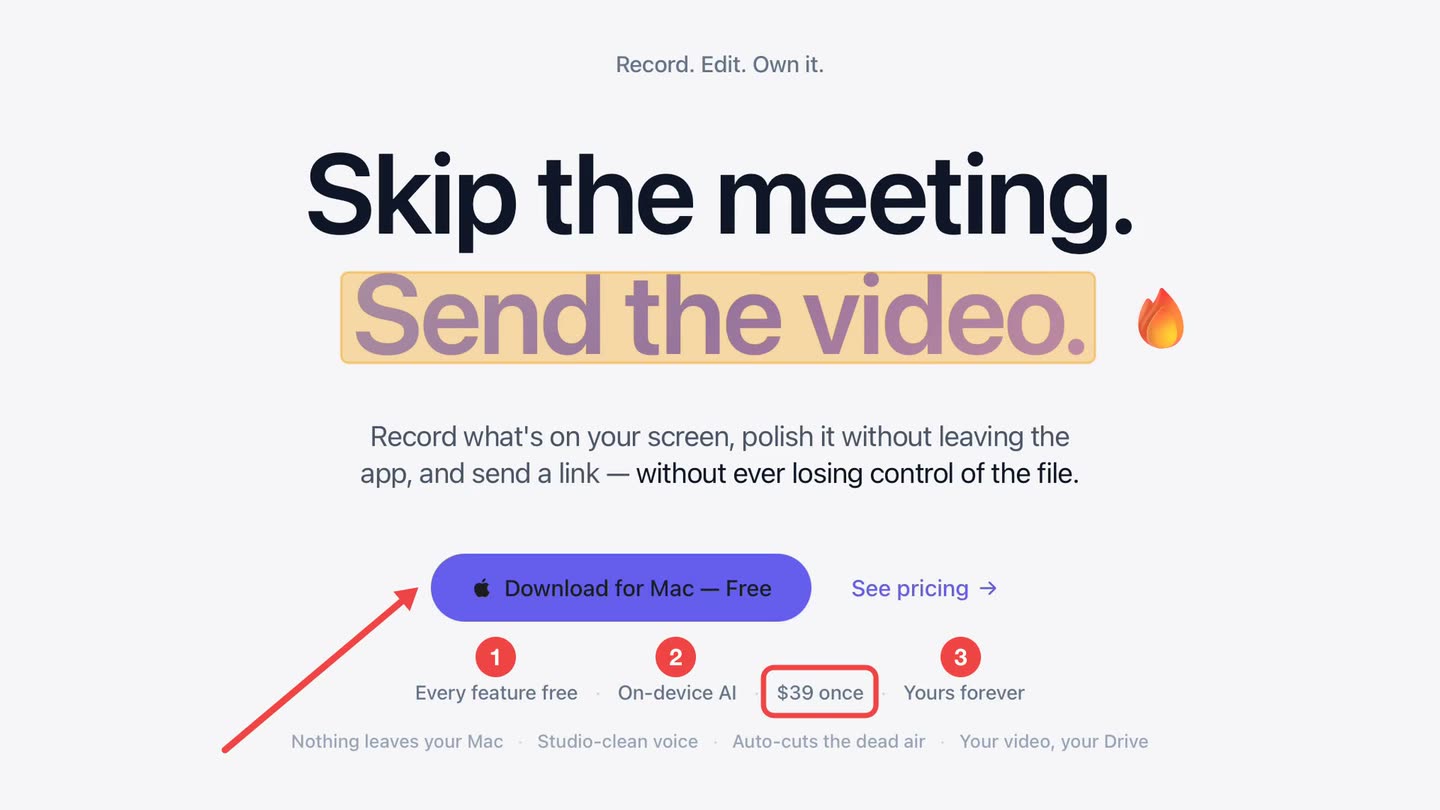
Recordings and exports carry the tier you are on. The free tier records and exports at 720p with a small watermark in the video; Pro is $39 once and lifts that to 4K at 60fps with no mark for everything you record after upgrading. Every tool on this page is free to use.
Questions people ask
Stop the recording and it opens in the OwnClip editor: clips on a timeline, audio on the tracks below, tools down one side. Trim it, zoom into what matters, caption the narration and mark the frame, then export. There is no import step and no second application.
Choose Combine Recordings on the Home screen and pick two or more recordings in the order they should play. You can also select them in the Library and choose Edit Together, or choose Add Recording in the editor. They sit on one timeline as clips you can split, trim, reorder and give their own Look, and each recording keeps its own blurs, camera and trims. Plain videos and images you drop in become clips too.
OwnClip runs on the latest macOS — currently macOS 26 — on an Apple silicon Mac. It is a native Mac app; there is no Windows or web version.
Free includes the whole editor — timeline, Smart Zoom, camera effects, audio cleanup, captions, annotations, and the screenshot and PDF editors. What it caps is the take itself: three minutes, recorded at 720p, with a small watermark recorded into the video. You can keep 25 recordings. A few tools are paid rather than capped — Video Analyst and Batch Beautify are Pro; Brand Studio, Go Live and Step Movie are Studio. Pro is $39 once and lifts every cap for what you record after upgrading; recordings made on Free stay 720p with the mark.
No. Edits live in a project file beside the recording and the original is never rewritten, so you can reopen a finished video months later, change one thing and export it again.
Yes. Smart Zoom, which turns the cursor activity from your recording into zoom moves on its own, works on every tier, and so does Cinematic Zoom, where you place the keyframes yourself. Free recordings and exports are 720p with a small watermark; Pro, $39 once, removes both for what you record after upgrading.
MP4 (H.264), HEVC, MOV, ProRes 422 and 4444, and GIF — all of them on every tier, including free. Free exports are capped at 720p and carry a small watermark; Pro and Studio export up to 4K at 60fps with no watermark.
Related
Coming from another tool? See how OwnClip compares with ScreenFlow and Screen Studio, or browse every comparison.
A Mac video editor that opens on your recording
Free to start. The latest macOS, Apple silicon. See what Pro and Studio add.