Beautify a screenshot on your Mac
A screenshot is a rectangle of pixels with hard edges. Beautify puts it on a background, adds padding, rounded corners and a shadow, and hands it back at the size your deck, changelog or post needs.
3D Tilt, Batch Beautify are part of Pro, a one-time $39 purchase. Best Quality AI backgrounds is part of Studio, a one-time $99 purchase. Everything else on this page is free.
Why a flat screenshot looks wrong
Nothing is wrong with the screenshot itself. It is a rectangle of pixels with hard edges, cropped to whatever the window happened to be, dropped onto a white slide beside type somebody set carefully.
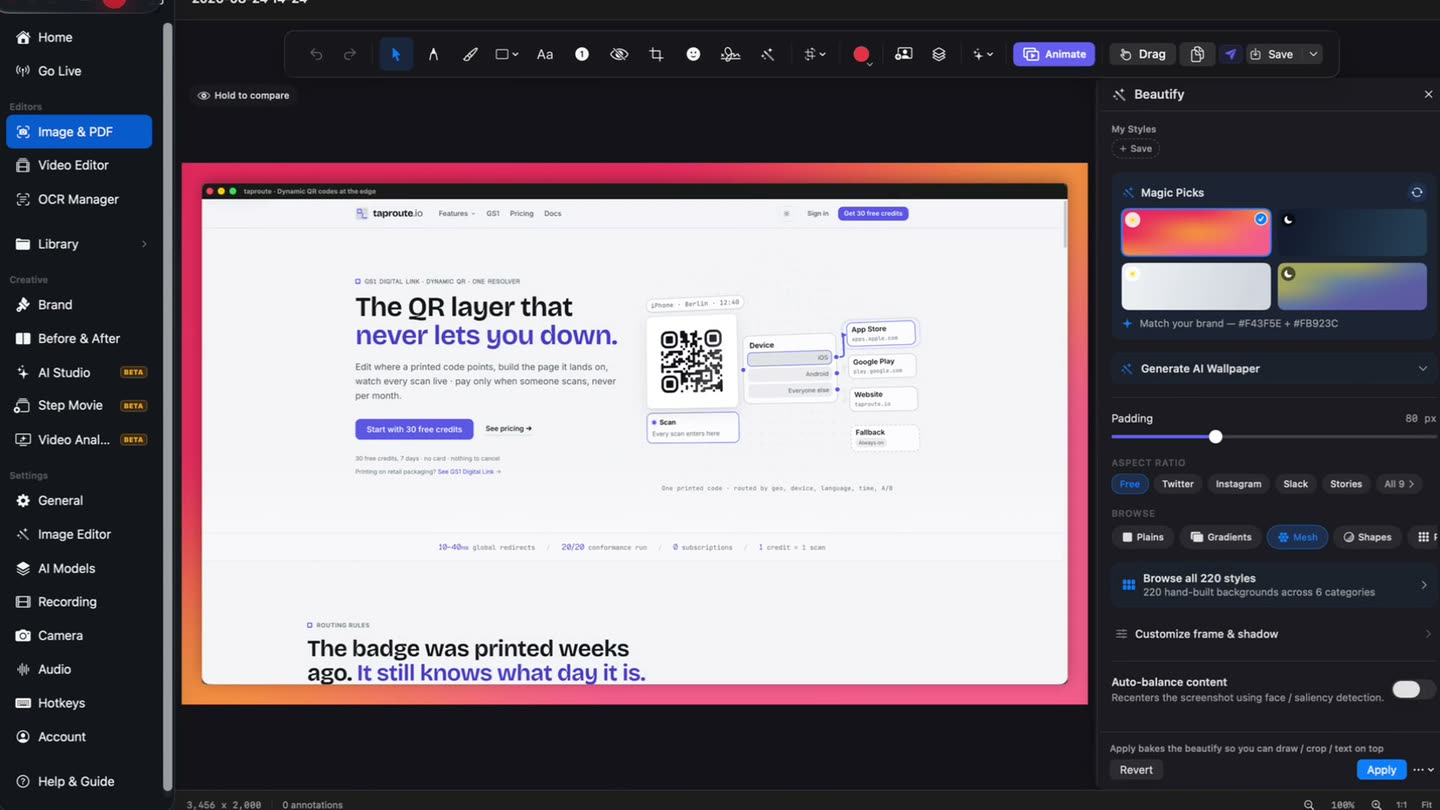
What makes screenshots look good is always the same short list: something behind them, some space around them, softer corners, and a shadow so the image sits on the page instead of being stuck to it. Beautify does all of that in the window the capture is already open in.
Every control on one panel.
Magic Picks sits at the top of the Beautify panel with up to four looks worked out from the capture itself — from its colours, and from your brand colours if you have set them. Under it are the background library, padding, the aspect presets and the frame and shadow controls, so nothing is buried in a dialog you have to go and find.
- Magic Picks
- 220 backgrounds
- Padding, corners, shadow
What you can change
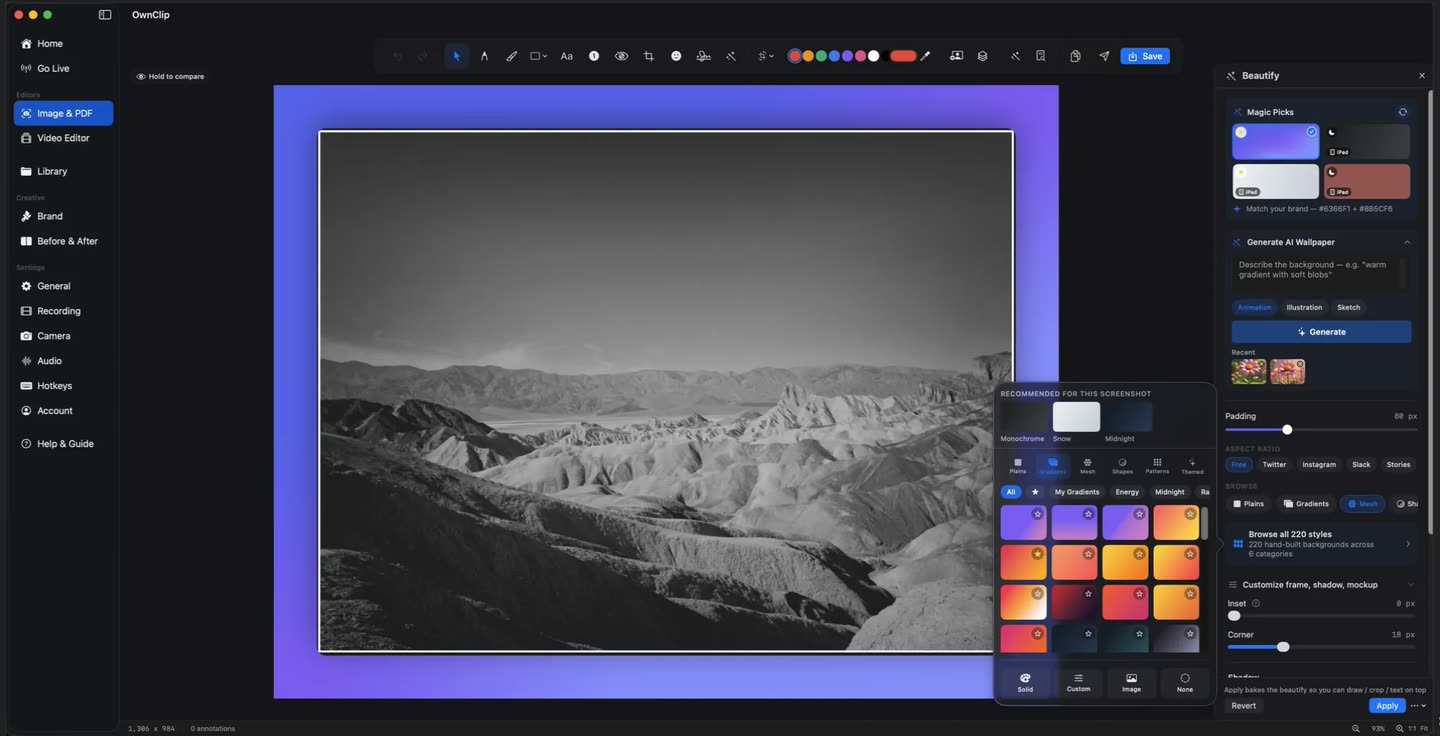
Beautify itself is on the free tier; free exports and copies carry a small watermark. The paid pieces are named where they apply.
220 backgrounds in six families
Plains, Gradients, Mesh, Shapes, Patterns and Themed, with favourites — or a solid colour, a gradient you mix yourself, an image of your own, or your desktop wallpaper.
A shadow that reads the background
Adaptive gives a pale backdrop a soft grey haze and a dark one a deeper shadow. Or pick Soft, Sharp, Glow, Layered, Hug or Spread and set the blur, offset and opacity yourself.
Tilt it in 3DPro
Turn and lean the framed capture up to 25° either way — drag it in the preview, or type the angle. The padding stays even at any angle.
Backgrounds generated on your Mac
Describe a background and it is made on the Mac, with nothing uploaded — free where the Mac supports on-device image generation. Best Quality renders at the exact shape of the canvas; it is Studio, on Macs with 16 GB of memory.
Looks you can reuse
Save a look as a style and put it on the next capture with one click. On Studio, a look can become your brand style, which sits in the same row in both editors.
A whole folder at oncePro
Batch Beautify applies one look to a set of images and writes each result beside its original, which is left untouched.
Turn the capture toward the viewer.
Drag the framed shot in the preview and it turns in 3D, or set Turn and Lean to the exact degree. The capture is refitted as it turns, so the padding stays even and a tilted card never runs off the edge of the canvas.
- Drag to tilt
- Turn and Lean
- Layered shadow
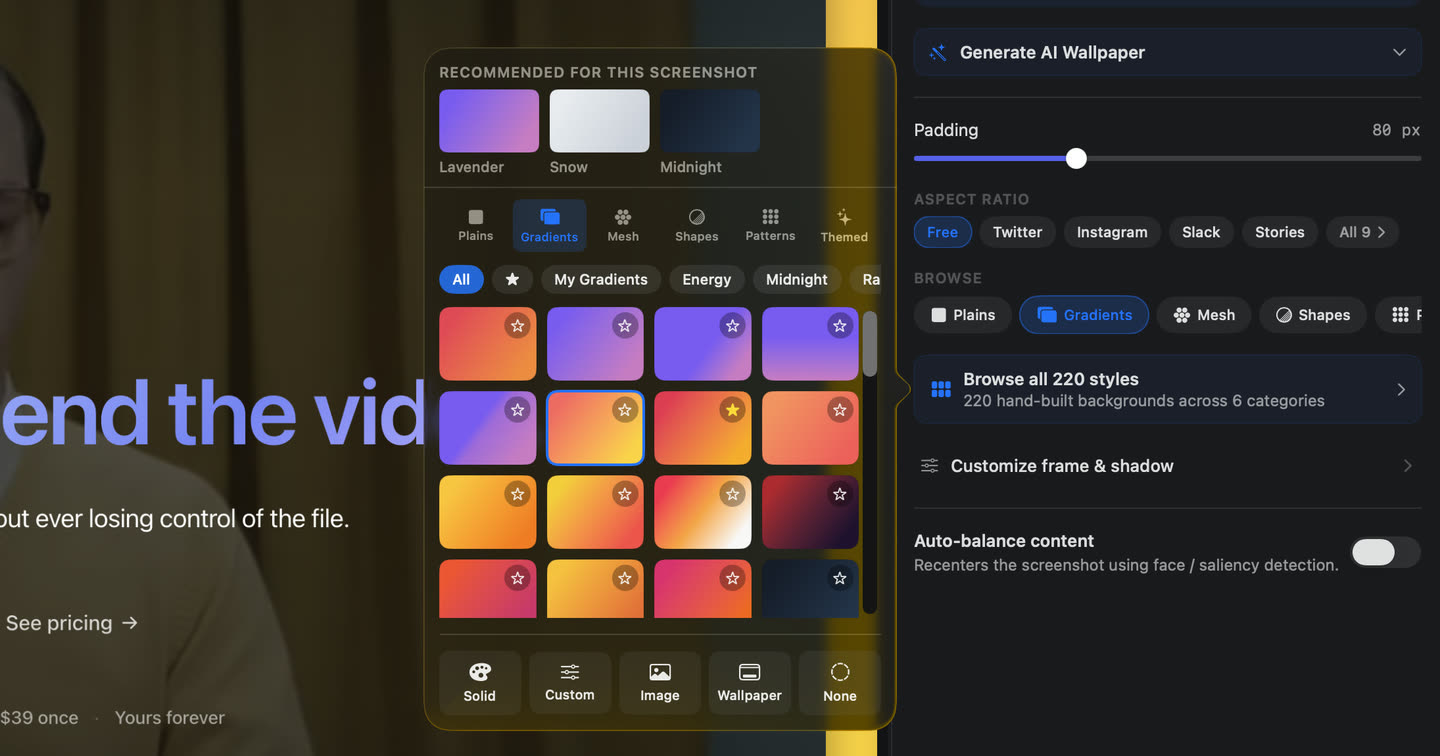
Two backgrounds, one screenshot.
Drop the capture on one background, then on another, with the padding, corners and shadow carried straight across. Trying a second look costs a click, so you stop shipping the first one you landed on.
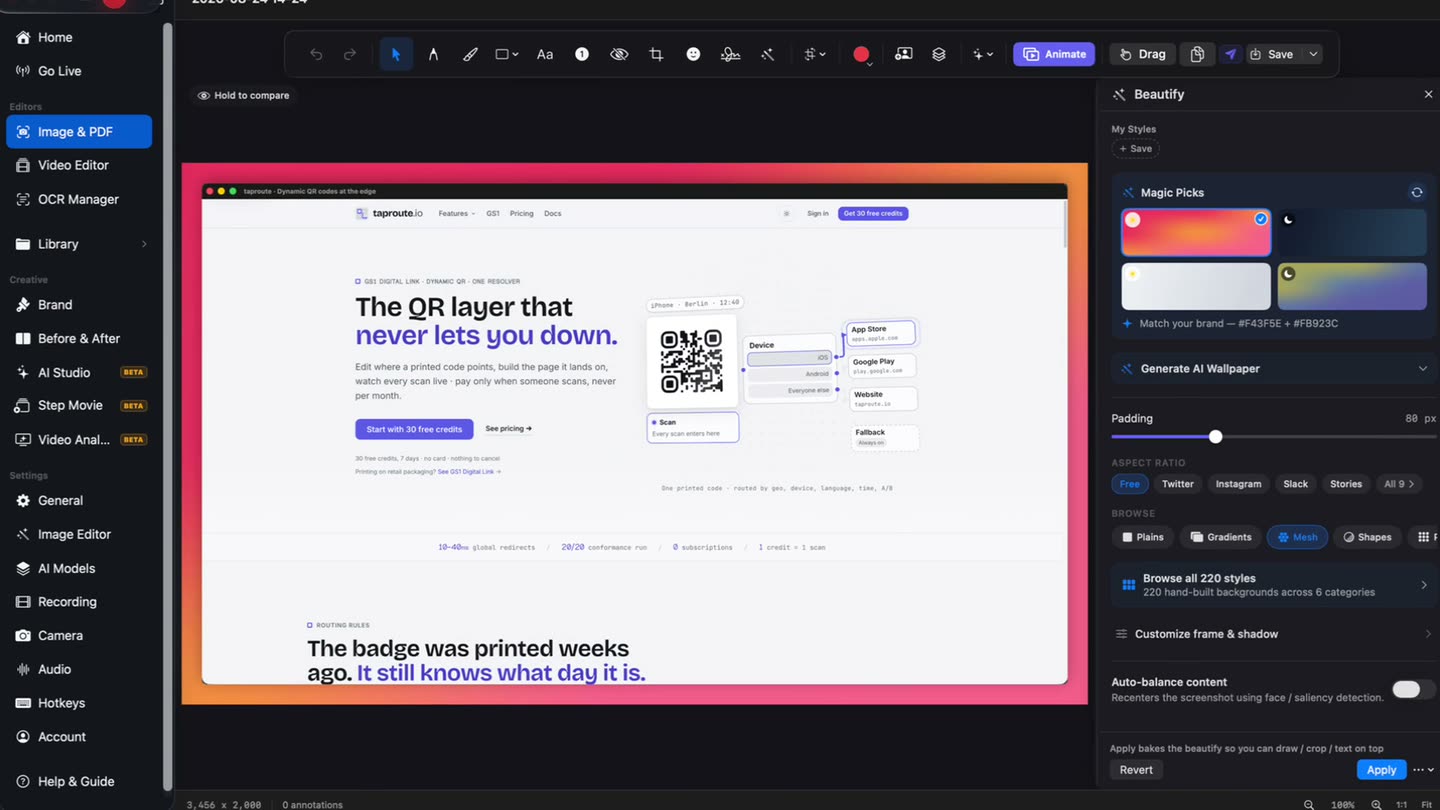
From capture to pasted image
- 1Take the shotFull screen, one window, or a region you drag. It lands in the panel that appears after each capture, and one click opens it in the screenshot editor.
- 2Open BeautifyTake one of the Magic Picks, or set the background, padding, corners and shadow yourself.
- 3Size itPick the aspect preset for wherever the image is going, or leave it free and keep the proportions of the capture.
- 4Copy or exportCopy the framed image straight to the clipboard for the deck you already have open, drag it into another app, or write it out as a file.
Frame it and fix it.
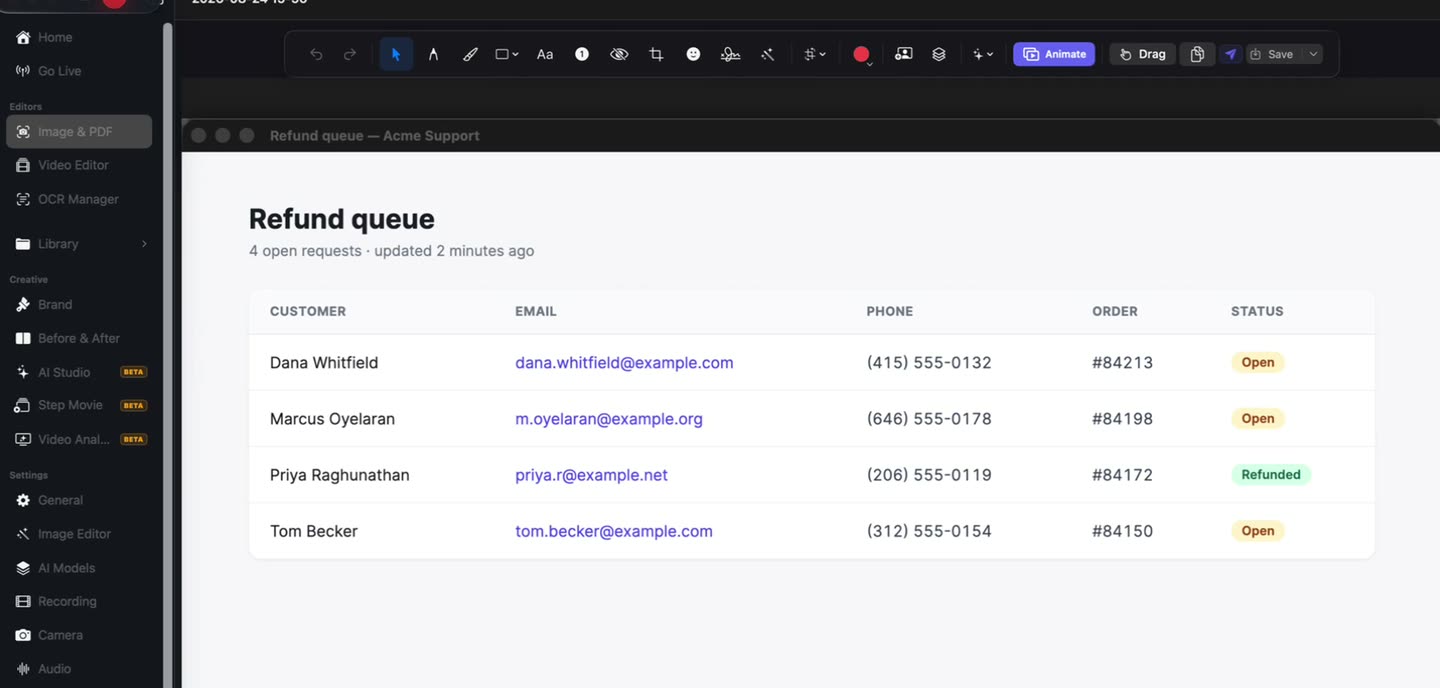
Beautify is a panel in the screenshot editor, not a separate mode. The markup toolbar sits over the same image, so blurring a real email address out of the shot happens before you frame it, not in another app afterwards.
- Markup toolbar
- Blur tool
Where a framed capture pays off
Release notes and changelogs
A shot on a background reads as a deliberate illustration instead of evidence somebody pasted in at the last minute.
Link previews and social posts
The header and OG image presets match the shapes those slots crop to, so nobody else decides where your image gets cut.
Decks and one-pagers
Padding and a shadow give the capture a relationship to the slide around it, which is most of what makes a slide look finished.
Docs and support replies
One framed, marked-up image answers the question that would otherwise take a paragraph and a follow-up.
Questions people ask
OwnClip runs on the latest macOS — currently macOS 26 — on an Apple silicon Mac. It is a native Mac app; there is no Windows or web version.
Beautify is on the free tier: all 220 backgrounds, your own images and wallpaper, padding, corners, every shadow option, the nine aspect presets, Magic Picks and saved styles. Free exports and copies carry a small watermark, which Pro removes at $39 once. Pro also adds 3D Tilt and Batch Beautify. Best Quality AI backgrounds and brand styles are Studio at $99 once. Both are one-time payments, not subscriptions.
Open it in the screenshot editor, open Beautify and take one of the Magic Picks, which read the capture and propose a background, padding and shadow that suit it. If none of them is right, the background library and the padding, corner and shadow controls are on the same panel.
Yes. Beautify works on any image you open in the screenshot editor, not only on captures taken with OwnClip, so an old PNG gets the same backgrounds, shadows and aspect presets.
Yes, with Pro. Drag the framed capture in the preview to turn it, or set Turn and Lean to an exact angle, up to 25° each way. The padding stays even at any angle, so the tilted card never runs off the canvas.
No. You describe the background and it is generated on your Mac; nothing is uploaded. The standard engine is free on Macs that support on-device image generation. Best Quality renders at the exact shape of your canvas and is part of Studio, on Macs with at least 16 GB of memory.
Yes. The video editor has the same Beautify panel: a background, padding, rounded corners and a shadow around the recording, rendered into the export. A recording can also use a clip of your own as a moving backdrop, and each camera layout part can have its own background.
Save a look as a style and apply it to the next capture from the same panel. Applying it to a whole set of images in one pass is Batch Beautify, which is Pro.
Related
Coming from another tool? See how OwnClip compares with CleanShot X, or browse every comparison.
Beautify a screenshot on your Mac
Free to start. The latest macOS, Apple silicon. See what Pro and Studio add.